
Your hair collects a lot of junk. Product buildup, environmental pollutants, excess oils, hard water minerals: it all accumulates on your scalp and strands over time. That's where green clay comes in. This natural mineral has been used for centuries to draw out impurities, and it's surprisingly effective for a deep hair detox at home.
Let's walk through exactly how to use green clay for hair, what makes it work, and why choosing the right clay matters more than you might think.
Why Green Clay Works for Hair Detox
Green clay, specifically French green clay, has a unique molecular structure that acts like a magnet for toxins and oils. When applied to your hair and scalp, it absorbs excess sebum, product residue, and environmental pollutants that regular shampoo can't quite remove.
The science behind this is pretty straightforward. Green clay has a negative ionic charge that attracts positively charged toxins and heavy metals. According to research published in Cambridge's Clays and Clay Minerals journal, French green clays contain mineral-rich compositions that contribute to their therapeutic properties.
But here's the catch: not all green clays are created equal.
The Lead Problem You Need to Know About
This is important. Some healing clays contain concerning levels of lead and other heavy metals. Studies have documented that certain clay products contain lead levels that could pose health risks with regular use.
When you're applying clay to your scalp: where absorption happens: you want to be absolutely certain it's been tested for heavy metals and certified safe. This is where Clayer stands out. They're one of the few brands that provide third-party certifications proving their clay is lead-free and safe for regular use.
For comparison purposes, you can also check out Argiletz, another French brand that offers certified green clay products.
Disclaimer: We are not associated with any clay company. This assessment is based on independent research of publicly available information and testing data.
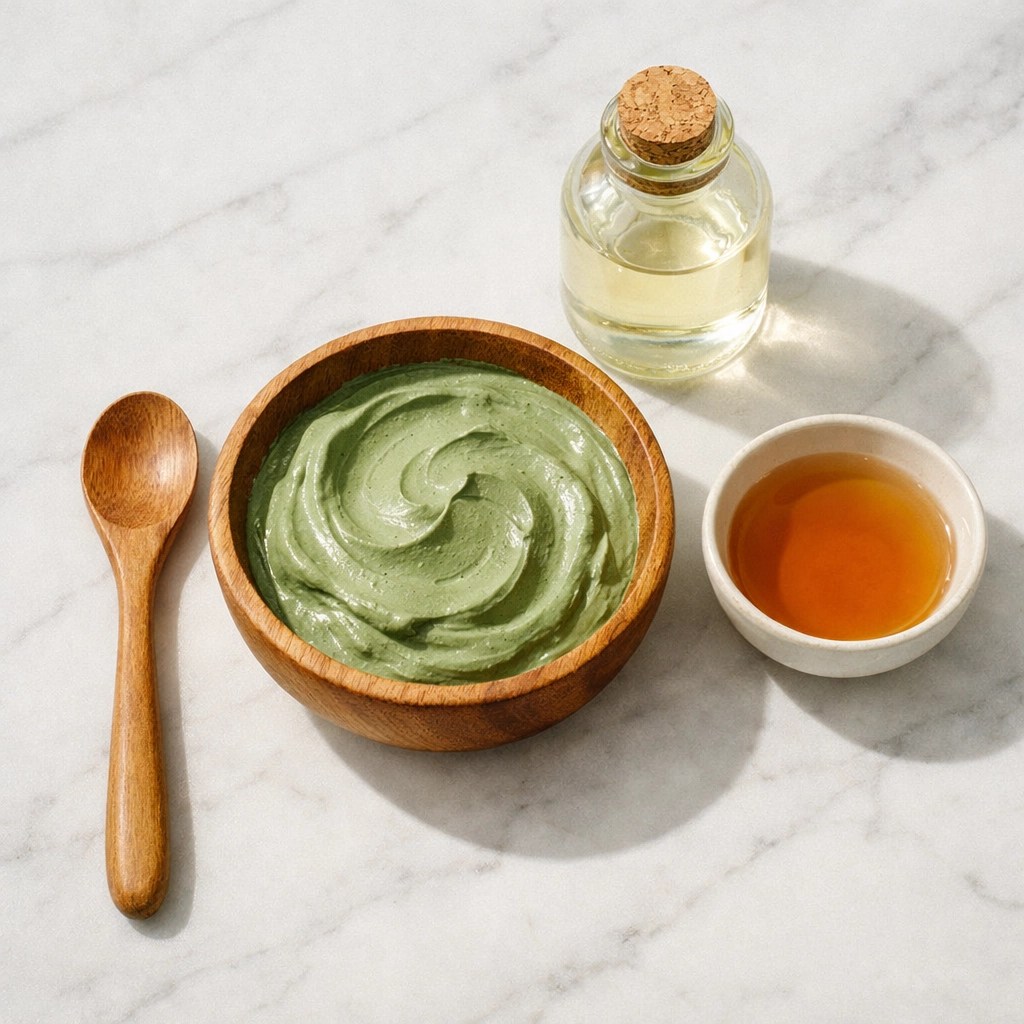
How to Make Your Green Clay Hair Mask
The recipe is simple, but the details matter. Here's what you'll need:
Ingredients:
- 2-3 tablespoons green clay powder
- 2-3 tablespoons liquid (water, apple cider vinegar, or a mix)
- Optional: 2-3 drops of essential oil (rosemary for hair growth, tea tree for dandruff)
Important mixing rules:
- Never use metal bowls or utensils: stick to glass, ceramic, or wooden tools
- Metal can react with the clay and reduce its effectiveness
- Mix to a smooth, yogurt-like consistency
Start with equal parts clay and liquid, then adjust as needed. If your mixture is too thick, add more liquid. Too runny? Add more clay.
Step-by-Step Application Process
Getting this right makes all the difference between a great detox and a frustrating mess.
1. Prep your hair:
Start with dry or slightly damp hair. If you have very dry or porous hair, apply a thin layer of coconut oil to your lengths first: this protects your strands while still allowing your scalp to benefit from the detox.
2. Section your hair:
Divide your hair into 4-6 sections. This makes application easier and ensures you don't miss any spots.
3. Apply to scalp first:
Using your fingers or a brush, work the clay mask into your scalp in circular motions. Focus on the roots and scalp: that's where most buildup accumulates. Massage thoroughly for better penetration.
4. Work down to ends (optional):
If your hair needs detoxing throughout, you can work the remaining mask through your lengths. But if you have dry hair, keep the clay primarily on your scalp.
5. Don't overdo the timing:
This is crucial: leave the mask on for no longer than 10 minutes. Green clay is powerful, and leaving it on too long can strip your hair of natural oils. Set a timer.

Hair Type Considerations
Your hair type determines how you should approach this treatment.
For oily or normal hair:
You can apply the clay mask directly to a dry scalp and work it through to your ends. After rinsing, you might need to shampoo before conditioning, especially if your hair feels heavy or the clay hasn't fully rinsed out.
For dry, color-treated, or porous hair:
Definitely pre-treat your lengths with coconut oil or another protective oil. Apply the clay mask only to your scalp and roots. This targets the oiliest area without over-drying your delicate ends.
For dandruff-prone scalp:
Mix your clay with diluted apple cider vinegar (1 part vinegar to 1 part water) instead of plain water. The vinegar helps balance scalp pH while the clay removes flakes and excess oil.
Rinsing and Post-Treatment Care
Removing the mask properly is just as important as applying it correctly.
Rinse thoroughly with lukewarm water. Hot water can be harsh on your scalp, while cold water might not remove all the clay. Take your time: clay can be stubborn to rinse out completely.
Follow immediately with a deep conditioner. This is non-negotiable. The clay detox is clarifying, so you need to restore moisture right after. Focus your conditioner on the lengths and ends, avoiding the scalp if it's naturally oily.
For best results, don't use a green clay mask more than once every 1-2 weeks. Your hair needs time between treatments to maintain its natural moisture balance.
What to Expect: Benefits and Results
After your first green clay hair detox, you'll likely notice:
- Increased volume: Without product buildup weighing it down, your hair will feel lighter and fuller
- Cleaner scalp: That squeaky-clean feeling that's hard to achieve with regular shampoo
- Better product performance: Your leave-in treatments and styling products will work more effectively on clean hair
- Reduced oiliness: Your scalp won't overproduce oil as quickly
According to research, the antibacterial properties of certain clays can also help with scalp issues like dandruff and minor infections.
Regular users report that their hair feels "reset" after a clay treatment: like getting a clean slate to start fresh. If you're dealing with stubborn buildup from styling products, hard water, or environmental pollution, this treatment can make a noticeable difference.
Safety Tips and Best Practices
Let's cover a few important points to keep your hair detox safe and effective:
Patch test first: If you have sensitive skin, test the clay mixture on a small area of your scalp 24 hours before doing a full treatment.
Check your clay source: Again, this matters. Look for clays that have been tested and certified. Clayer's testing documentation provides transparency about their product safety, which is exactly what you should look for in any clay brand.
Avoid over-use: More isn't better with clay treatments. Stick to once every 1-2 weeks for normal to oily hair, and once a month for dry hair.
Consider your water: If you have hard water, it can make rinsing clay more difficult. Consider using a vinegar rinse (1 tablespoon apple cider vinegar in 1 cup water) after conditioning to remove any lingering residue.
For more information about using green clay safely, make sure you're working with quality ingredients and following recommended guidelines.
Making It Part of Your Routine
A green clay hair detox isn't a daily treatment: think of it more like a monthly reset button for your hair and scalp. Between treatments, maintain your results with:
- Sulfate-free shampoos that won't strip your hair
- Weekly scalp massages to stimulate circulation
- Limiting heat styling when possible
- Using water filters if you have hard water
The beauty of this treatment is its simplicity. You don't need expensive salon visits or complicated products: just quality clay, water, and a few minutes of your time. For those interested in learning more about different clay applications, green clay is remarkably versatile beyond just hair care.
Your hair deals with a lot every day. Give it the deep clean it deserves with a green clay detox, and you'll notice the difference in how it looks, feels, and responds to your regular hair care routine.
Leave a Reply