
Disclaimer: We are not associated with any clay company. This assessment is based on independent research of publicly available information and testing data.
If you’ve ever dealt with a stubborn sports injury, nagging joint pain, or even just some weird skin inflammation, you might have heard someone whisper the words "clay poultice." It sounds a bit like ancient medicine: and that’s because it is. But there’s a reason people have been slathering mud on themselves for thousands of years: it works.
Specifically, we’re talking about green clay. Not all mud is created equal, and when it comes to drawing out toxins and reducing swelling, French green clay (like Illite) is the heavyweight champion. In this guide, I’m going to walk you through exactly how to master the art of the clay poultice so you can stop scrolling and start healing.
What Exactly is a Clay Poultice?
Think of a poultice as a super-charged band-aid made of earth. It’s a thick paste made of healing clay and water applied directly to the skin. Unlike a thin face mask that dries in ten minutes, a poultice is designed to stay moist and work deep into the tissues over a longer period.
The magic happens through two processes: adsorption and absorption. The clay acts like a magnet, pulling out positively charged toxins and waste products from your body while simultaneously depositing minerals into the skin. If you want to dive deeper into the science of how this works, check out our ultimate guide to green clay.
The Golden Rule: No Metal!
Before we even touch the clay, we need to talk about the most important rule in the clay world. Never let your healing clay touch metal.
Why? Because green clay is electromagnetically charged. When it comes into contact with a metal spoon or bowl, it loses its charge and effectively "turns off" before it ever hits your skin. To keep the clay active and powerful, always use:
- Glass, ceramic, or wooden bowls.
- Wooden or bamboo spoons/spatulas.
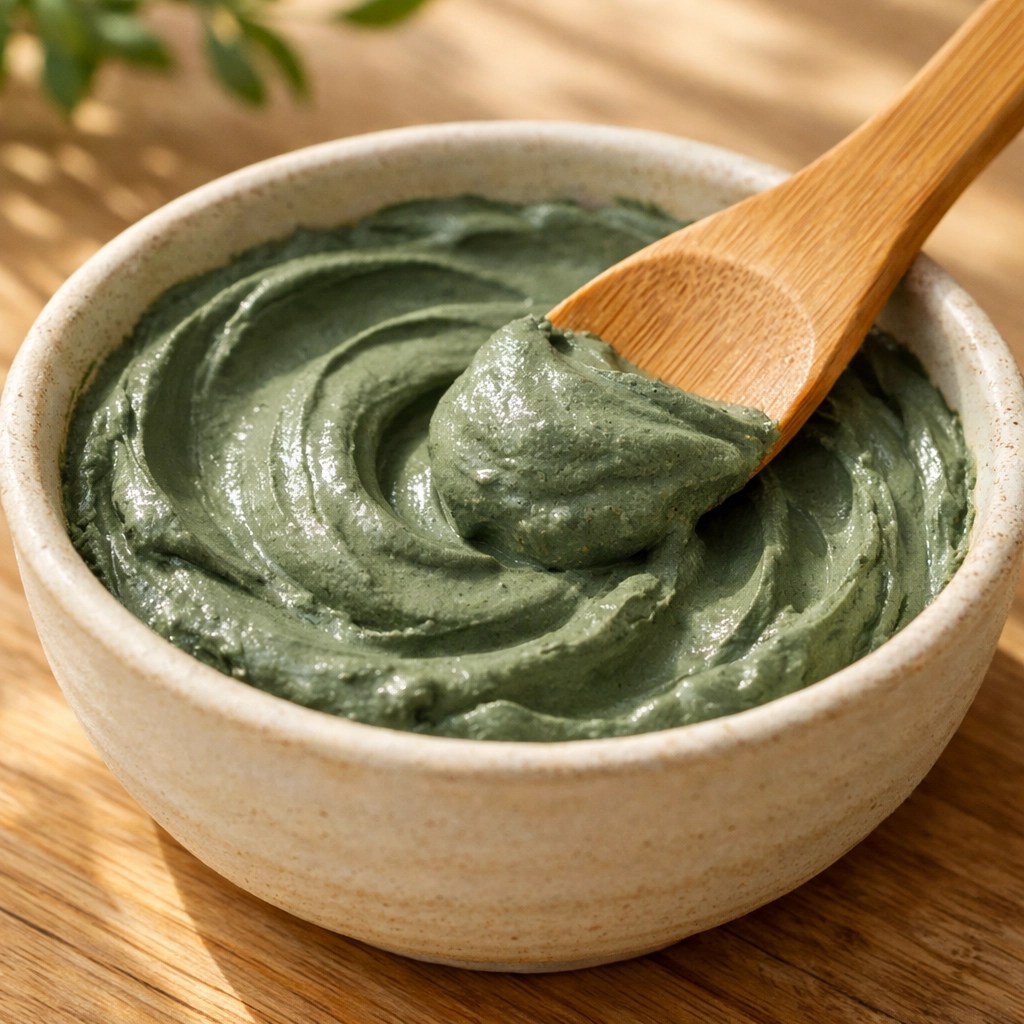
(Suggested caption: A wooden spoon stirring green clay in a glass bowl, illustrating the "no metal" rule.)
According to scientific studies on French green clays, the mineralogical structure is what gives it such high therapeutic value. Don't ruin that structure by using a stainless steel spoon!
Choosing Your Clay
You have two main options here:
- Powdered Clay: You buy it dry and mix it yourself. It’s cost-effective but requires a bit of prep work.
- Ready-made Paste: Companies like Clayer offer pre-mixed tubes of high-quality French green clay. This is a lifesaver if you’re traveling or just want to apply it quickly after a workout.
If you are picking up a tub of powder, make sure it is high-quality. Some cheaper brands don't test for heavy metals, which is a major red flag. In fact, research shows that some clays can contain high lead levels if they aren't properly sourced. You can read more about why certified non-toxic clay is essential here.
Step 1: Preparing the Paste
If you’re using powdered clay, here is the "smart friend" method for getting the perfect consistency:
- The Ratio: Start with about 1 cup of clay powder in your glass bowl.
- The Water: Gradually add mineral water (avoid tap water if possible to keep it pure).
- The Wait: Instead of stirring like crazy immediately, let the water sit on top of the clay for a few minutes. Let the clay drink it up naturally.
- The Mix: Use your wooden spoon to fold it until it looks like thick Greek yogurt or smooth peanut butter. You want it firm enough to stay on your leg without sliding off, but moist enough to spread easily.
Pro-tip: If you're dealing with a cold injury (like a fresh sprain), use cool water. For chronic stiffness, some people prefer slightly warm water.
Step 2: Applying the Poultice
Now for the messy part.
- The Thickness: Spread the clay about 1 to 2 centimeters thick (roughly half an inch). Don't be stingy! A thin layer will dry out too fast and stop working.
- Direct Contact: Apply it directly to the skin. If the area is very hairy, you can put a single layer of gauze down first, then the clay, then another layer of gauze: but skin-to-clay contact is always the gold standard.
- Placement: Focus on the center of the pain or inflammation and spread outward.
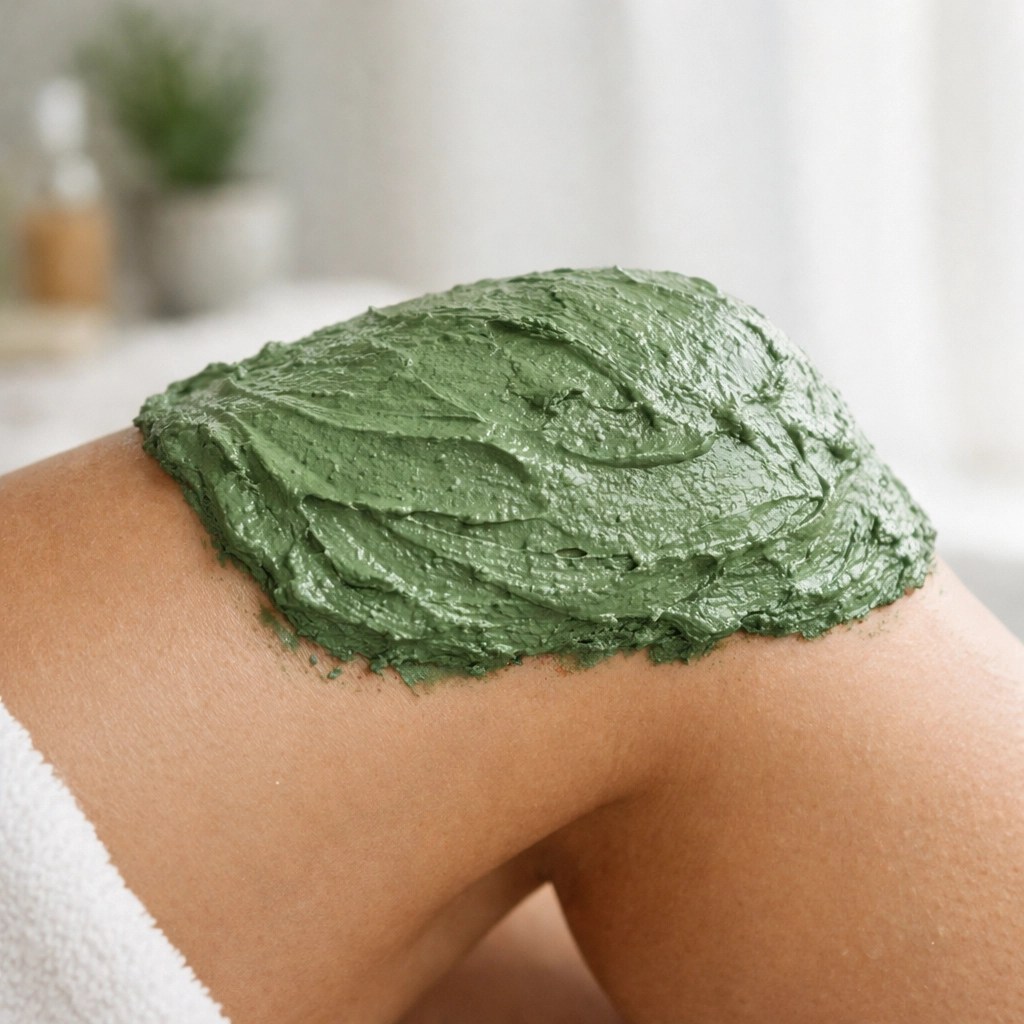
(Suggested caption: A thick layer of green clay being applied to a knee with a wooden spatula.)
Step 3: Wrapping and Keeping it Moist
A dry poultice is a useless poultice. Once the clay dries, it stops pulling toxins and starts pulling moisture out of your skin, which can be irritating.
- Cover it: Use a piece of cheesecloth, cotton, or a damp thin towel to cover the clay.
- Wrap it: Secure the cloth with a light bandage or plastic wrap (though cotton is better for letting the skin breathe).
- Check it: If you feel the clay starting to tighten or itch, it’s getting dry. Spray it with a little water or take it off.
Step 4: Timing and Removal
How long should you leave it on?
- Minimum: 20 minutes.
- Maximum: 4 hours.
For acute injuries, 2 hours is usually the "sweet spot." You can do this up to 3 times a day for serious inflammation.
To remove: Peel off the bandage/cloth. Most of the clay should come off with it. For the leftovers, use warm water and a washcloth. Never reuse the clay. Once it’s been on your skin, it’s full of whatever it pulled out of you. Toss it in the trash (not the drain, unless you want a clogged sink!).
Why We Recommend Clayer for This Process
While we are independent, we can't ignore the data. In our comparisons of Clayer vs. Aztec Secret vs. Bentonite, Clayer consistently comes out on top for poultices.
Most brands like Aztec Secret are bentonite-based, which is great for face masks but can be very drying and harsh for long-term poultice use. Clayer uses authentic French Illite clay, which is much better for sensitive skin and is specifically formulated for athlete recovery.

As you can see in the chart above, Clayer is one of the few brands that carries the necessary safety certifications and heavy metal testing. When you're putting a thick layer of something on your skin for four hours, you want to be 100% sure it’s clean. For those in high-performance sports, you can find more specialized advice at bestsportrecovery.blog.
The Science of Healing
It’s not just "hippie magic." Modern science is catching up to what traditional medicine has known for years. For instance, researchers have discovered that certain clays have incredible antibacterial properties, effectively killing bacteria that are resistant to traditional antibiotics.
Applying a poultice isn't just about "chilling out"; it's a legitimate therapeutic intervention. Whether you are using it for detox or to speed up recovery from a marathon, the mineral exchange is real.

Summary Checklist for Your First Poultice
- Gather non-metal tools (glass bowl, wooden spoon).
- Source high-quality green clay (We suggest checking out Clayer for their purity standards).
- Mix to a thick paste or use a pre-mixed tube.
- Apply a 2cm thick layer to the affected area.
- Cover with a damp cloth to prevent drying.
- Leave for 1-2 hours, then rinse with warm water.
- Repeat as needed (up to 3 times a day).
If you’re still feeling unsure about which clay to buy, take a look at our guide on choosing the right green clay. It breaks down the differences between Illite, Montmorillonite, and Kaolin so you can get the best results for your specific needs.
Mastering the clay poultice takes a little practice and a little patience, but once you feel that cooling relief on a swollen ankle or an angry back muscle, you'll never want to go back to messy chemical creams again. Happy healing!
Leave a Reply